Crafting the Ultimate Homemade Chocolate Cherry Ice Cream Experience
There's something undeniably magical about the combination of rich, dark chocolate and the bright, tart sweetness of cherries. It's a classic pairing that evokes warmth, indulgence, and pure bliss. While store-bought versions offer convenience, nothing compares to the fresh, vibrant flavors and creamy texture of homemade
chocolate cherry ice cream. If you're searching for the ultimate
chocolate cherry ice cream recipe to elevate your dessert game, you've come to the right place. This guide will walk you through crafting not one, but two distinct and equally delightful versions, ensuring every spoonful is a dream come true.
Making ice cream at home might seem daunting, but with the right ingredients and a good ice cream maker, it's a wonderfully rewarding process. You control the quality, the sweetness, and the intensity of those beloved chocolate and cherry notes. Prepare to impress your family and friends (or simply treat yourself!) with a dessert that's both comforting and sophisticated.
Why Homemade Chocolate Cherry Ice Cream Reigns Supreme
Choosing to make your chocolate cherry ice cream from scratch offers a plethora of benefits that go beyond just taste. For starters, you have complete control over the ingredients. This means opting for organic dairy, selecting your favorite variety of cherries at their peak ripeness, and choosing high-quality chocolate that melts into perfection. You can also adjust the sweetness level to your preference, making it healthier or more indulgent as you see fit.
Furthermore, the freshness of homemade ice cream is unparalleled. The vibrant flavor of ripe cherries and the deep notes of melted chocolate are far more pronounced than in commercial versions that often rely on artificial flavorings or less-than-fresh fruit. It's an experience that truly celebrates the seasonal bounty of cherries and the timeless appeal of chocolate.
Mastering the Decadent Chocolate Cherry Swirl Ice Cream Recipe
This particular
chocolate cherry ice cream recipe marries a smooth, creamy chocolate base with ribbons of sweet and tangy cherry sauce. The contrast in textures and flavors makes for an incredibly dynamic and exciting dessert. It’s perfect for those who love the elegance of a marbled confection.
Ingredients for Chocolate Cherry Swirl:
- 2 cups heavy cream (full-fat for ultimate creaminess)
- 1 cup whole milk
- ¾ cup granulated sugar (for the ice cream base)
- 1 teaspoon pure vanilla extract
- 1 cup fresh or frozen cherries, pitted and roughly chopped
- ½ cup semi-sweet chocolate chips or finely chopped chocolate bar
- 2 tablespoons granulated sugar (for the cherry sauce)
- 2 tablespoons water
Step-by-Step Instructions:
- Craft the Cherry Swirl Sauce: In a small saucepan, combine your chopped cherries, 2 tablespoons of sugar, and 2 tablespoons of water. Bring the mixture to a gentle simmer over medium heat, stirring occasionally. Allow it to cook for about 8-10 minutes, or until the cherries soften and break down, creating a thick, syrupy sauce. Remove from heat and let it cool completely. Pro tip: For an extra smooth swirl, you can lightly mash the cherries with a fork as they cook or use an immersion blender once cooled.
- Prepare the Velvety Ice Cream Base: In a large mixing bowl, whisk together the heavy cream, whole milk, ¾ cup granulated sugar, and vanilla extract. Continue whisking until the sugar is fully dissolved. A good way to check is to rub a small amount between your fingers – you shouldn't feel any grit.
- Melt the Chocolate Magic: Place your chocolate chips or chopped chocolate in a microwave-safe bowl. Microwave in 20-second bursts, stirring well after each interval, until the chocolate is completely smooth and melted. Be careful not to overheat it.
- Churn and Swirl: Pour the prepared cream mixture into your ice cream maker's canister and churn according to the manufacturer's instructions. This typically takes 20-30 minutes, until the ice cream reaches a soft-serve consistency. In the final 5 minutes of churning, slowly drizzle in the melted chocolate and the cooled cherry sauce. The machine will gently incorporate them, creating those beautiful swirls. For an even more pronounced swirl, you can add some melted chocolate and cherry sauce in layers as you transfer it to the freezer container. This technique is often seen in an easy homemade chocolate cherry swirl ice cream recipe.
- Freeze to Perfection: Transfer the freshly churned ice cream into an airtight container. Press a piece of parchment paper or plastic wrap directly onto the surface to prevent ice crystals from forming. Freeze for a minimum of 4 hours, or ideally overnight, until it's firm enough to scoop.
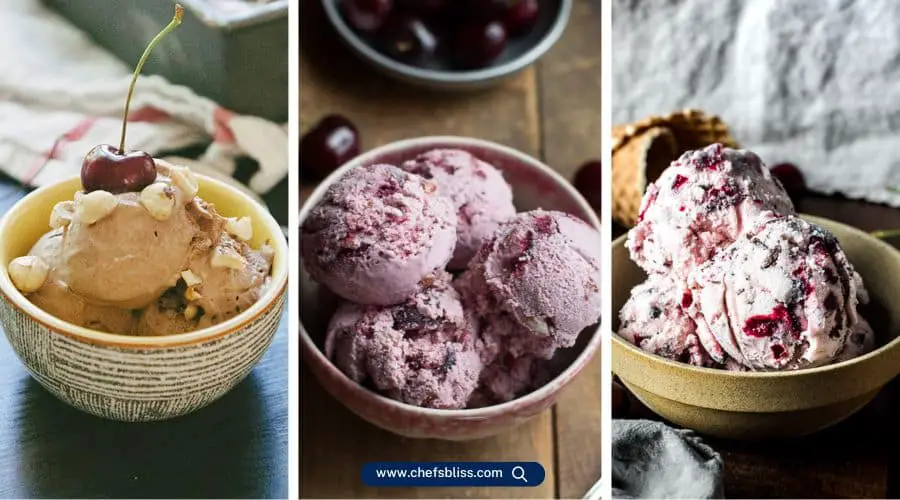
Dive into the Richness of Cherry Chocolate Chunk Ice Cream
For those who love substantial texture in their ice cream, the cherry chocolate chunk version is an absolute delight. This recipe focuses on a luscious base generously studded with large, satisfying pieces of chocolate and juicy, macerated cherries. Every bite offers a delightful contrast between creamy ice cream, snappy chocolate, and tender fruit.
Ingredients for Cherry Chocolate Chunk:
- 2 cups heavy cream
- 1 cup whole milk
- ¾ cup granulated sugar
- 1 teaspoon pure vanilla extract
- 1 cup fresh or frozen cherries, pitted and halved
- 1 cup good quality semi-sweet chocolate chunks (or a bar roughly chopped)
- 2 tablespoons cherry juice or cherry liqueur (optional, but highly recommended for enhanced flavor)
Step-by-Step Instructions:
- Macerate the Cherries: In a medium bowl, combine the halved cherries with the optional cherry juice or liqueur. Gently toss to coat. Let them sit for 15-20 minutes. This process, called maceration, helps to draw out the natural juices and enhances the cherry flavor, preventing them from freezing too solid in the ice cream.
- Create the Creamy Ice Cream Base: In a large mixing bowl, whisk together the heavy cream, whole milk, granulated sugar, and vanilla extract until the sugar has completely dissolved.
- Churn the Base: Pour the cream mixture into your ice cream maker and churn according to the manufacturer's instructions until it reaches the consistency of soft-serve.
- Fold in the Goodness: Once the ice cream is nearly done churning (about 5 minutes before completion), add the macerated cherries (draining any excess liquid if using a lot of liqueur) and the chocolate chunks. Allow the machine to churn for a few more minutes to evenly distribute them. Alternatively, if your machine is small, you can gently fold them in by hand after churning is complete.
- Harden and Enjoy: Transfer the ice cream to an airtight freezer-safe container, pressing parchment paper or plastic wrap directly onto the surface. Freeze for at least 4 hours, or overnight, to achieve the perfect scoopable consistency.
Essential Tips for the Best Homemade Ice Cream
Achieving that perfect, creamy texture and vibrant flavor in your homemade
chocolate cherry ice cream recipe goes beyond just following the steps. Here are some pro tips:
- Quality Ingredients Matter: Always use full-fat heavy cream and whole milk for the creamiest results. For chocolate, opt for a brand you love to eat on its own – its flavor will shine through. When cherries are in season, fresh is best, but high-quality frozen cherries work beautifully too.
- Chill Your Base Thoroughly: For optimal churning, ensure your ice cream base is *very* cold before it goes into the machine. Chilling it in the refrigerator for at least 4 hours, or even overnight, can significantly improve the texture.
- Don't Overfill Your Ice Cream Maker: The mixture will expand as it churns, so stick to the manufacturer's recommended fill line.
- Pre-freeze Your Churning Bowl: If your ice cream maker uses a freezer bowl, make sure it's completely frozen solid (usually 15-24 hours) for the most efficient churning.
- Avoid Ice Crystal Formation: When freezing, place a piece of plastic wrap directly onto the surface of the ice cream before sealing the container. This creates a barrier against air and helps prevent freezer burn and ice crystals.
- Let it Soften Slightly: For the best scooping experience, take your homemade ice cream out of the freezer about 5-10 minutes before serving.
Variations and Personal Touches
While these two recipes provide a fantastic starting point, don't hesitate to experiment!
*
Roast Your Cherries: For a deeper, more caramelized cherry flavor, roast your pitted cherries with a touch of sugar before making the sauce or folding them into the ice cream.
*
Different Chocolates: Experiment with dark chocolate chunks for a more intense bitter contrast, or milk chocolate for a sweeter, creamier profile. White chocolate chips could also create a beautiful visual and flavor contrast.
*
Add a Touch of Almond: A hint of almond extract (¼ to ½ teaspoon) in the ice cream base beautifully complements the cherry flavor.
*
Spice It Up: A pinch of cinnamon or a tiny dash of cayenne pepper could add an unexpected warmth to the chocolate base.
Conclusion
Whether you opt for the elegant swirls or the satisfying chunks, making your own chocolate cherry ice cream is an incredibly rewarding culinary adventure. Each
chocolate cherry ice cream recipe presented here promises a delightful experience, allowing you to savor the rich, creamy texture and the vibrant, balanced flavors of this classic pairing. So, gather your ingredients, fire up your ice cream maker, and prepare to indulge in a homemade treat that truly embodies dessert perfection. Enjoy every spoonful!